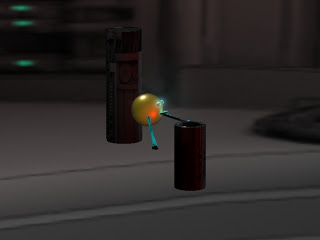
I created an all new robot with new textures and colors for the lighting assignment. I used a gold metallic for the head of the robot and a non reflective material for the arms that has twists and bulge on it. I added a spotlight to the front of the robot that I aimed towards the ground. I also added directional lighting pointed towards the columns. The left column I pointed red directional light at and blue on the other column. The directional lights reflect off of the robot in the front.
Thursday, February 24, 2011
Thursday, February 17, 2011
Video Parenting and Expressions
This is my video for the advanced animation assignment. I photoshopped Spongebob and separated all his limbs from his body and imported all of them. I parented all of his limbs to his body. I then moved the position of his body so he is swimming away from the shark. Then I adjusted and rotated all of the limbs to look like he was swimming. I then used the expression opacity to have Spongebob fade away at the end after he is bitten.
Untitled from Valeria Vianes on Vimeo.
Robot Materials and Texture Mapping Assignment
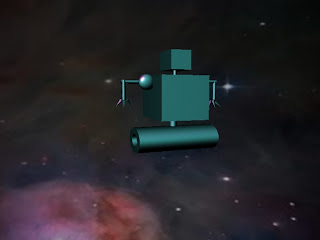
I used the robot that I created for the first assignment and added new materials and texture mapping on it. I selected all of the different polygons that make up the robot and assigned a new material to the whole robot. I used the metallic paint material and changed the color to pink. then I made a huge sphere that surrounded the robot. I then put a picture of a nebula on the sphere so that it looks like my robot is floating in outer space.
Thursday, February 10, 2011
After Effects First Animation
Spongebob from Valeria Vianes on Vimeo.
Here is my video that I made using After Effects for the first time. I found the pictures of Spongebob and the shark on google and then used the selection tool in Photoshop and resaved them. Then I imported them as compositions into After Effects over the background I found. I changed the position of the shark at different intervals and sped it up the closer he got to Spongebob. I also gradually changed the size of the blood to look like its spreading.
Robot Assignment
Here is the robot I created, using Maya for the first time. It is loosely based on one of the robot sketches I did in the first week of class. I created each body part separately and then used the four view window to connect and match them in place from each view. Then I added eyes by making the live so that the eyes protrude from the head. I then added the glow effect on the eyes to finish the robot. Here are some side views of the robot.
Thursday, February 3, 2011
Visual Effects & Motion Graphics Assignment 1
I used my perspective drawing that I made for Computer Animation and 3D modeling and made multiple image adjustments and created a mask layer. The picture already contained multiple layers that I made image adjustments on individually, using posterization, hue/saturation, vibrancy, and changing the exposure on certain buildings and inverting the middle flower. I also created a mask layer of the ground floor that I hid so that the original sketch ground floor is seen.
Assignment 1: Perspetive Drawing
This is my perspective drawing for the first assignment for Computer Animation and 3D Modeling. This was the first time I ever used Photoshop, so the end result turned out a bit simpler than I had originally drawn. I first drew a city on paper and then scanned it to the computer. Then I created a new layer for each building over my background layer of the drawing. I used the pen tool to make a new path for each side of the buildings by drawing over the original drawing. Then I used the gradient tool to paint each side and show shadows and depth. Here is the original drawing:
Subscribe to:
Comments (Atom)


